IOC到底是个什么东东呢?控制反转(Inversion of Control,英文缩写为IoC),其实就是这个东东。
你随便百度一下就会得到比较书面的解释:通过引入实现了IoC模式的IoC容器,即可由IoC容器来管理对象的生命周期、依赖关系等,从而使得应用程序的配置和依赖性规范与实际的应用程序代码分开。其中一个特点就是通过文本的配置文件进行应用程序组件间相互关系的配置,而不用重新修改并编译具体的代码。
说了这么多,通过一个例子就能很好的来理解。以前小王要找对象,要么云茫茫人海中进行匹配(通过 小王.对象=小张 这样的语法进行关联),要么通过3D打印直接打印出心中女神的样子(通过new实例化),而现在,只要到51CTO婚介中心去注册,同时提出自己的要求,51CTO婚介中心就会在所有的注册用户中进行匹配,如果有匹配上的就安排小王去相亲。
这儿的51CTO婚介心中就相当于是IOC容器,同时,因为有了中介(Ioc容器),找对象是不是变得非常简单了(很多事情不用小王自己去处理)。
解释完毕,接下来介绍spring中的IOC,其注入方式有以下三种:
- 属性注入(set注入)
- 构造器注入(构造方法注入)
- 工厂注入(很少使用,你如果非要用····,那就自己搞定吧,哈哈)
接下来,有请代码君上场! (的写代码前记得导入spring相关Jar包)
一、属性注入
属性注入有两种情况,一种是Java基本数据类型,一种是自定义类型,具体代码请往下看:
1.1) 编写Song实体类
//歌曲类
    public class Song {
    private int songID;       //歌曲ID
    private String songName;  //歌曲名
    private String songType;  //歌曲类型
    public Song() {   }
    public Song(int songID, String songName, String songType) {
        this.songID = songID;
        this.songName = songName;
        this.songType = songType;
    }
    public int getSongID() {
        return songID;
    }
    public void setSongID(int songID) {
        this.songID = songID;
    }
    public String getSongName() {
        return songName;
    }
    public void setSongName(String songName) {
        this.songName = songName;
    }
    public String getSongType() {
        return songType;
    }
    public void setSongType(String songType) {
        this.songType = songType;
    }
    }
1.2) 在spring配置文件中注入bean对象
<beans
    xmlns="http://www.springframework.org/schema/beans"
    xmlns:xsi="http://www.w3.org/2001/XMLSchema-instance"
    xmlns:p="http://www.springframework.org/schema/p"
    xsi:schemaLocation="http://www.springframework.org/schema/beans http://www.springframework.org/schema/beans/spring-beans-3.1.xsd">
    <bean id="yjm" class="com.pxy.entity.Song">
        <property name="songID" value="10086"></property>
        <property name="songName" value="一剪梅"></property>
        <property name="songType" value="经典老歌"></property>
    </bean>
</beans>
1.3) 创建Test类进行测试(简单点,普通类包含main方法就行)
public static void main(String[] args) {
ApplicationContext applicationContext = new ClassPathXmlApplicationContext("applicationContext.xml");
Song song = applicationContext.getBean("yjm", Song.class);
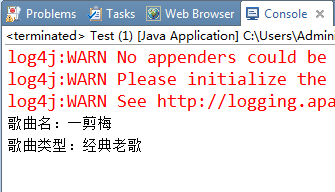
System.out.println("歌曲名:"+song.getSongName());
System.out.println("歌曲类型:"+song.getSongType());
}
1.4) 显示结果如下:
以上是基本数据类型的注入写法,如果包含自定义类型,则做如下修改:
1.5) 添加Singer实体类
public class Singer {
    private int singerID;        //歌手ID
    private String singerName;    //歌手姓名
    private String area;        //所属地区
    public int getSingerID() {
        return singerID;
    }
    public void setSingerID(int singerID) {
        this.singerID = singerID;
    }
    public String getSingerName() {
        return singerName;
    }
    public void setSingerName(String singerName) {
        this.singerName = singerName;
    }
    public String getArea() {
        return area;
    }
    public void setArea(String area) {
        this.area = area;
    }
}
1.6) 在Song类中添加Singer属性
//歌曲类
public class Song {
        //之前代码省略...
        //新增代码
    private Singer singer;        //对应歌手
    public Singer getSinger() {
        return singer;
    }
    public void setSinger(Singer singer) {
        this.singer = singer;
    }
}
1.7) 修改配置文件,添加Singer对象,并在Song对象中使用 ref 进行引用
<!-- 创建Singer对象fyq -->
    <bean id="fyq" class="com.pxy.entity.Singer">
        <property name="singerID" value="10000"></property>
        <property name="singerName" value="费玉清"></property>
    </bean>
    <!-- 创建Song对象yjm -->
    <bean id="yjm" class="com.pxy.entity.Song">
        <property name="songID" value="10086"></property>
        <property name="songName" value="一剪梅"></property>
        <property name="songType" value="经典老歌"></property>
        <!-- 使用ref引用上面的bean -->
        <property name="singer" ref="fyq"></property>
    </bean>
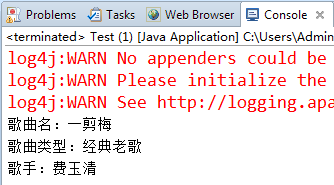
1.8) 修改测试类并查看结果
public static void main(String[] args) {
    ApplicationContext applicationContext = new ClassPathXmlApplicationContext("applicationContext.xml");
    Song song = applicationContext.getBean("yjm", Song.class);
    System.out.println("歌曲名:"+song.getSongName());
    System.out.println("歌曲类型:"+song.getSongType());
    System.out.println("歌手:"+song.getSinger().getSingerName());
}
属性注入的方式到这儿就告一段落....
二、构造器注入
前面我们已经在Song类中编写了构造方法Song(int songID, String songName, String songType),接下来,我们直接在spring配置文件中通过构造器方式来注入看看效果。
2.1) 在spring配置文件中注入bean对象
<bean id="jht" class="com.pxy.entity.Song">
    <constructor-arg index="0" value="10088"></constructor-arg>
    <constructor-arg index="1" value="菊花台"></constructor-arg>
    <constructor-arg index="2" value="流行歌曲"></constructor-arg>
</bean>
2.2) 在Test类中查看效果
public static void main(String[] args) {
    ApplicationContext applicationContext = new ClassPathXmlApplicationContext("applicationContext.xml");
    Song song = applicationContext.getBean("jht", Song.class);
    System.out.println("歌曲名:"+song.getSongName());
    System.out.println("歌曲类型:"+song.getSongType());
}
今天的内容就到这儿,感谢各位看官百闲中无聊逛到这儿并且还看完了!!!
最后,请各位看官离开前点个赞,如果实在没别的事做,顺便评论两句...
本文出自 “软件思维” 博客,请务必保留此出处http://softi.blog.51cto.com/13093971/1952958